AWS Project


Table of contents
- STEP 1: Go to ACM — Amazon Certificate Manager
- STEP 2: Go to Route53
- STEP 3: Establish connection between ACM and Route53
- STEP 4 : Create two RDS for PROD and DR
- STEP 5: Create a IAM ROLE
- STEP 6: Create two EC2 Instance
- STEP 7: Create Load Balancer
- STEP 8: Mapping Route53 and ELB
- STEP 9: Secure Connection for website
- STEP 10: Create two buckets on S3
The objective of this project is to synchronize the Disaster Recovery (DR) environment with the Production (PROD) environment by hosting WordPress on both environments using AWS services.
The Services used in this project :
Amazon Certificate Manager (ACM)
Route53 (R53)
Relational Database Service (RDS)
Identity and Access Management (IAM)
Elastic Compute Cloud (EC2)
Elastic Load Balancer (ELB)
Simple Storage Service (S3)
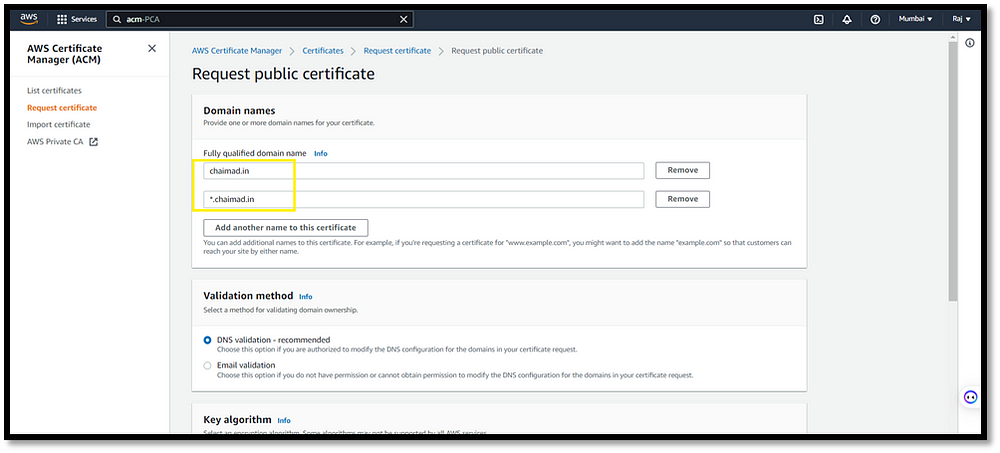
STEP 1: Go to ACM — Amazon Certificate Manager
· Request a Certificate — Request a public certificate
STEP 2: Go to Route53
· Hosted zone — Create Hosted Zone –
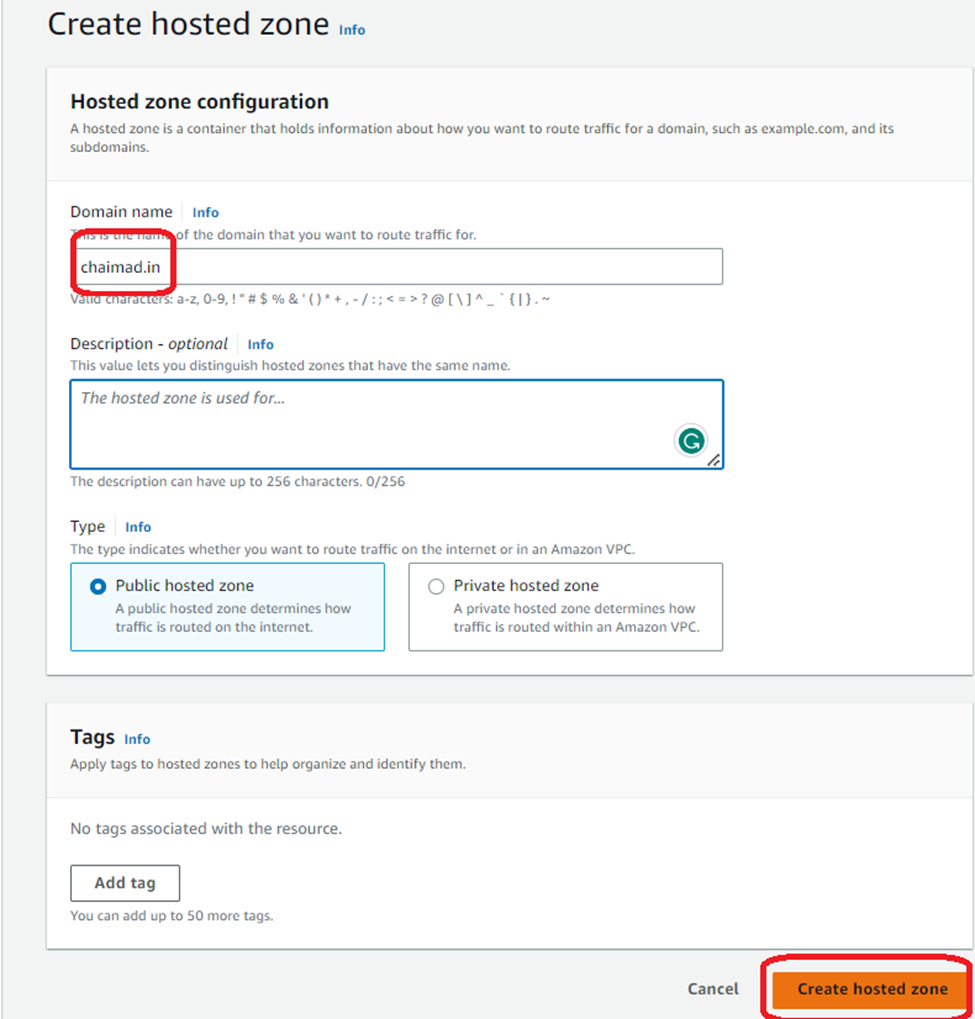
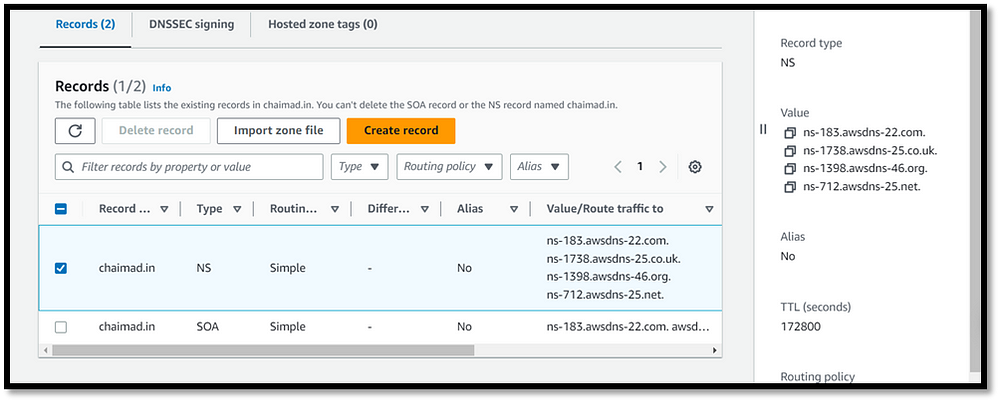
(Mapping the Value to the purchased DNS)
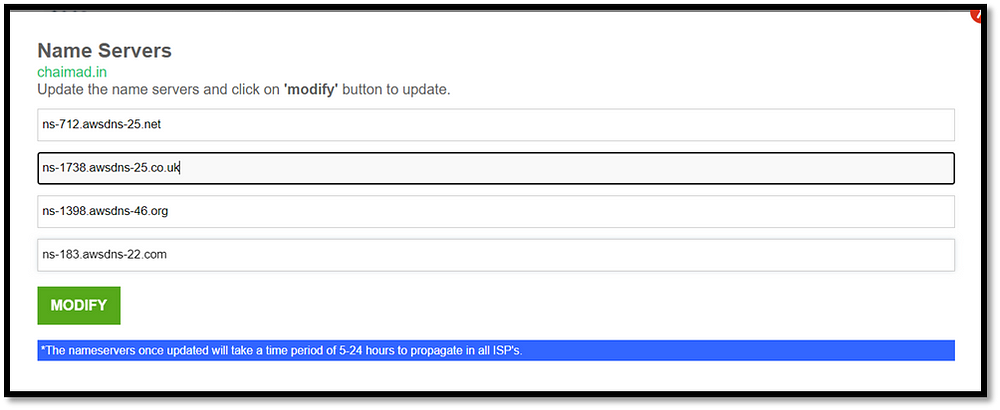
STEP 3: Establish connection between ACM and Route53
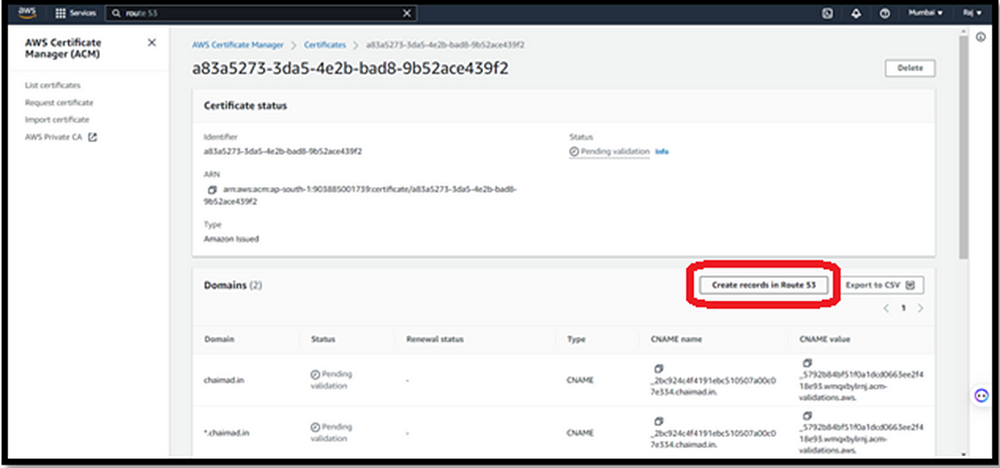

(The certificate we created in ACM mapped to route53)
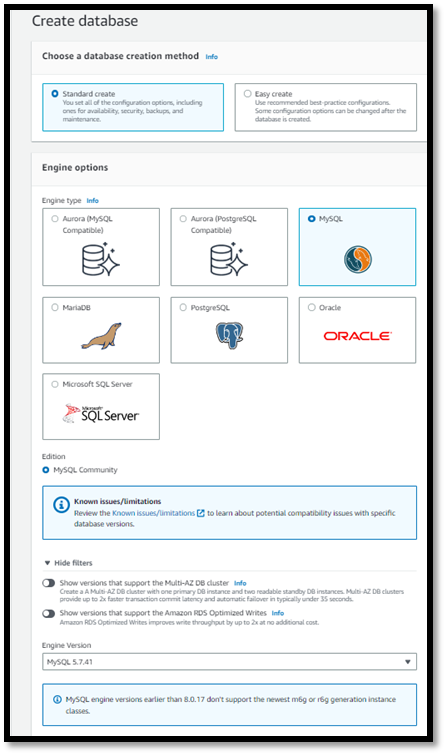
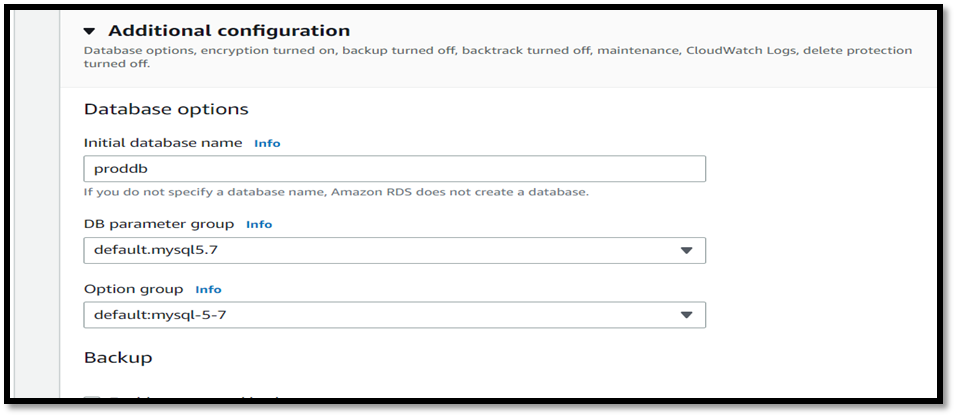
STEP 4 : Create two RDS for PROD and DR
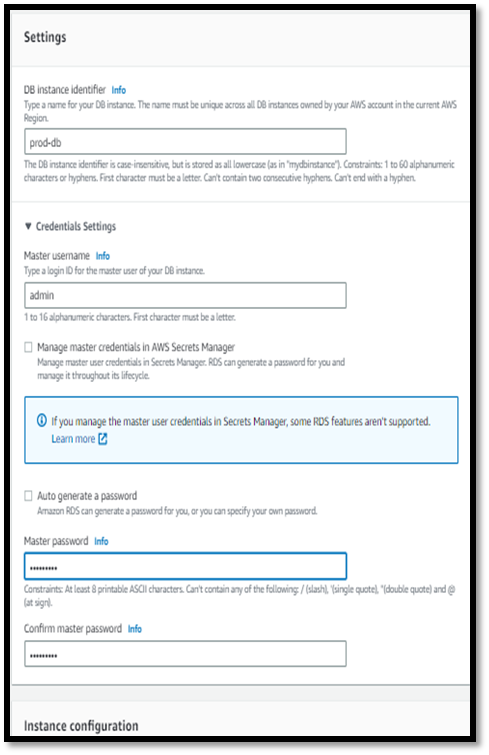
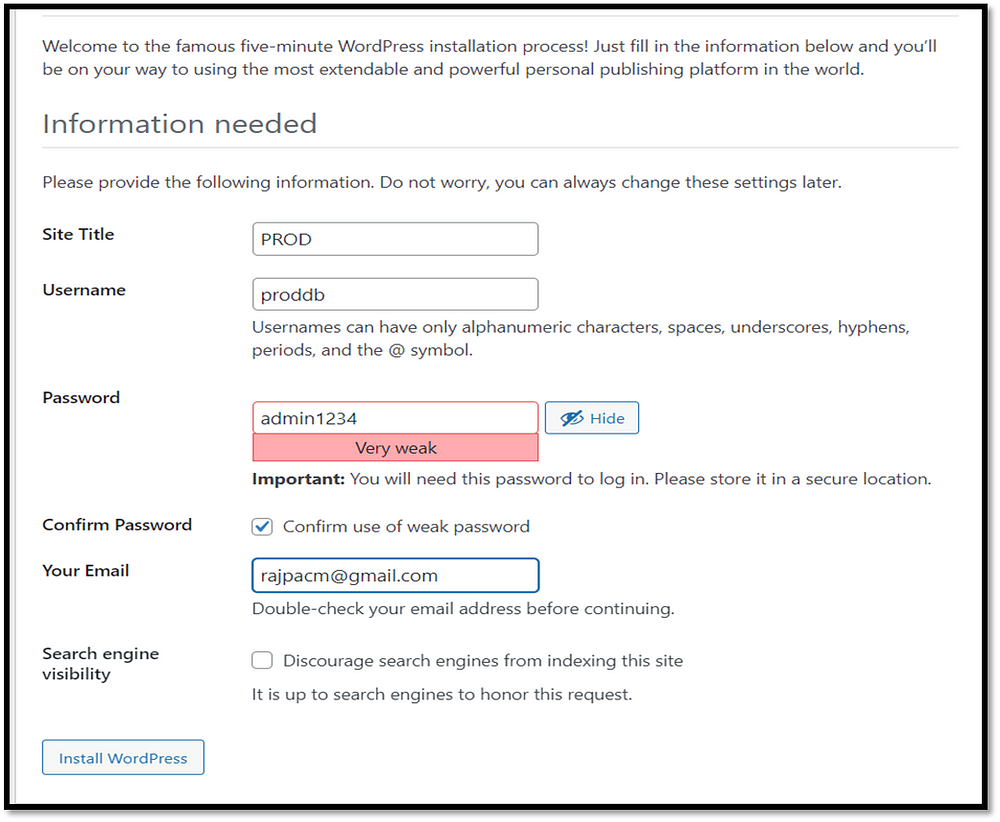
(for Prod Env , username-admin , password-admin1234)
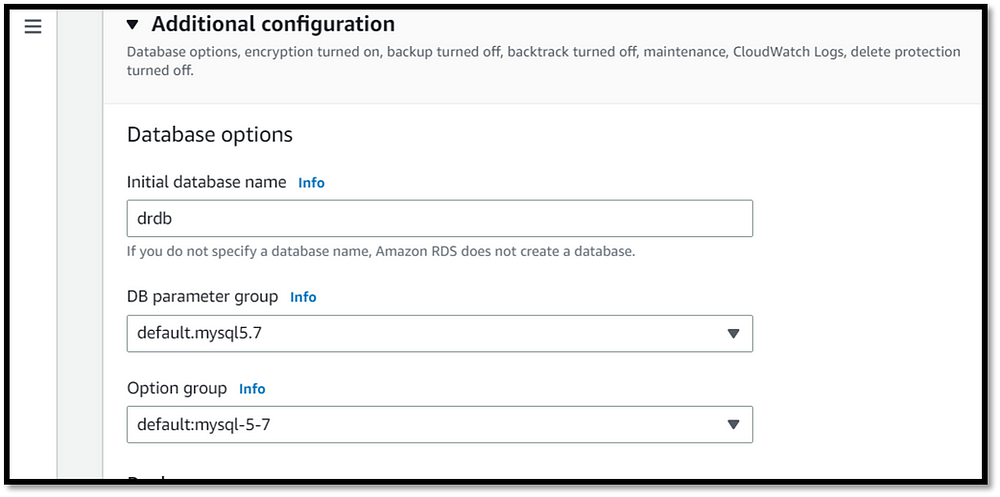
(for DR Env , username-admin , password-admin123)
STEP 5: Create a IAM ROLE
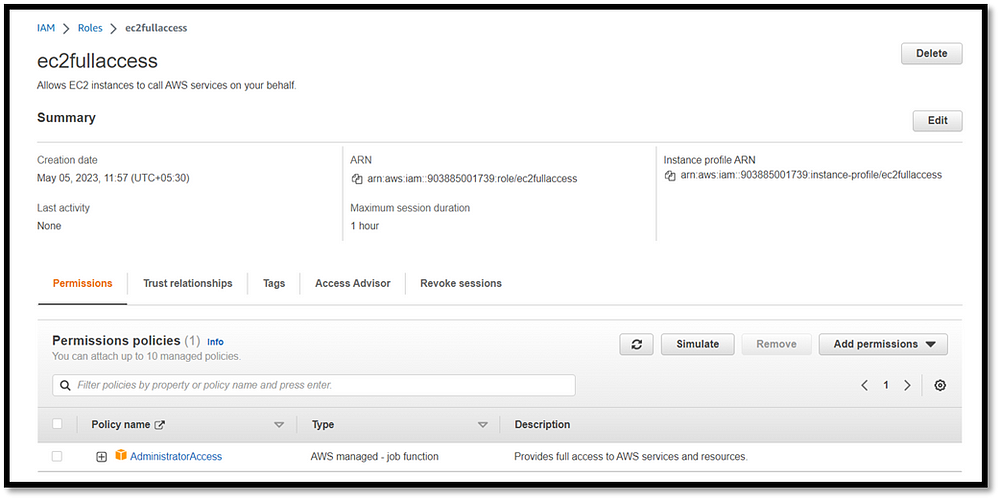
(Provide full access for EC2)
STEP 6: Create two EC2 Instance
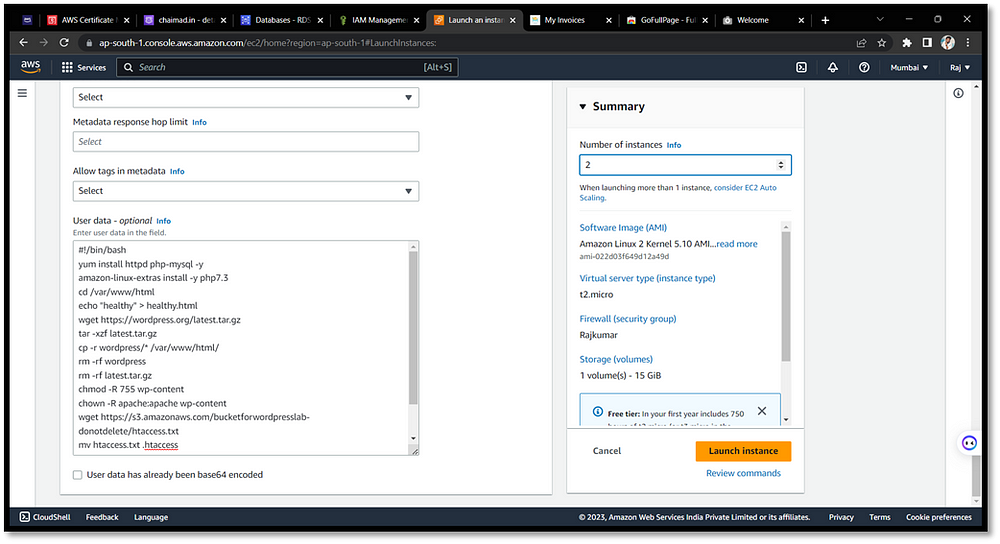
(two instances created for prod and dr)
userdata
#!/bin/bash
yum install httpd php-mysql -y
amazon-linux-extras install -y php7.3
cd /var/www/html
echo "healthy" > healthy.html
wget https://wordpress.org/latest.tar.gz
tar -xzf latest.tar.gz
cp -r wordpress/* /var/www/html/
rm -rf wordpress
rm -rf latest.tar.gz
chmod -R 755 wp-content
chown -R apache:apache wp-content
wget https://s3.amazonaws.com/bucketforwordpresslab-donotdelete/htaccess.txt
mv htaccess.txt .htaccess
chkconfig httpd on
service httpd start
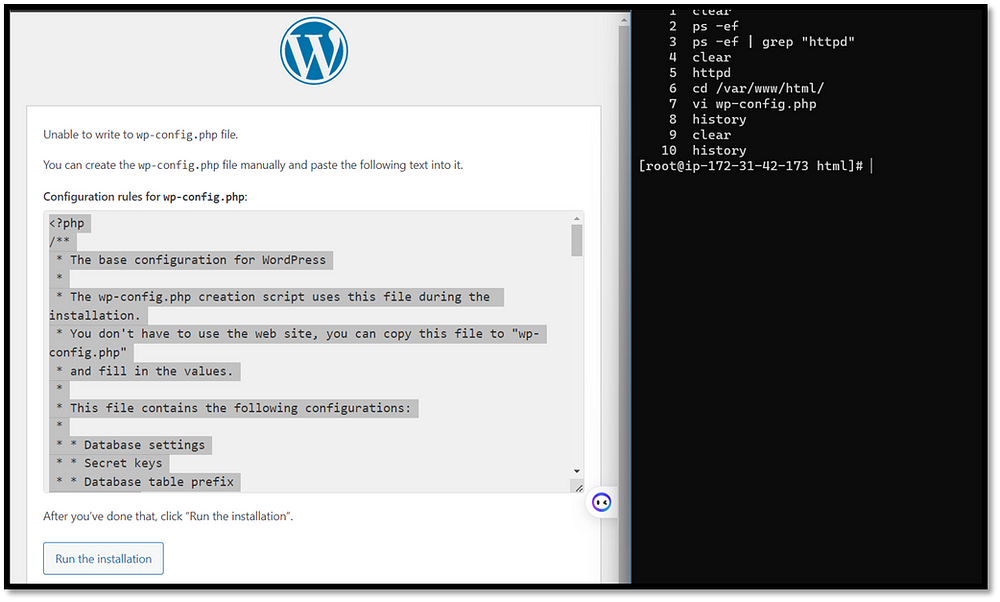
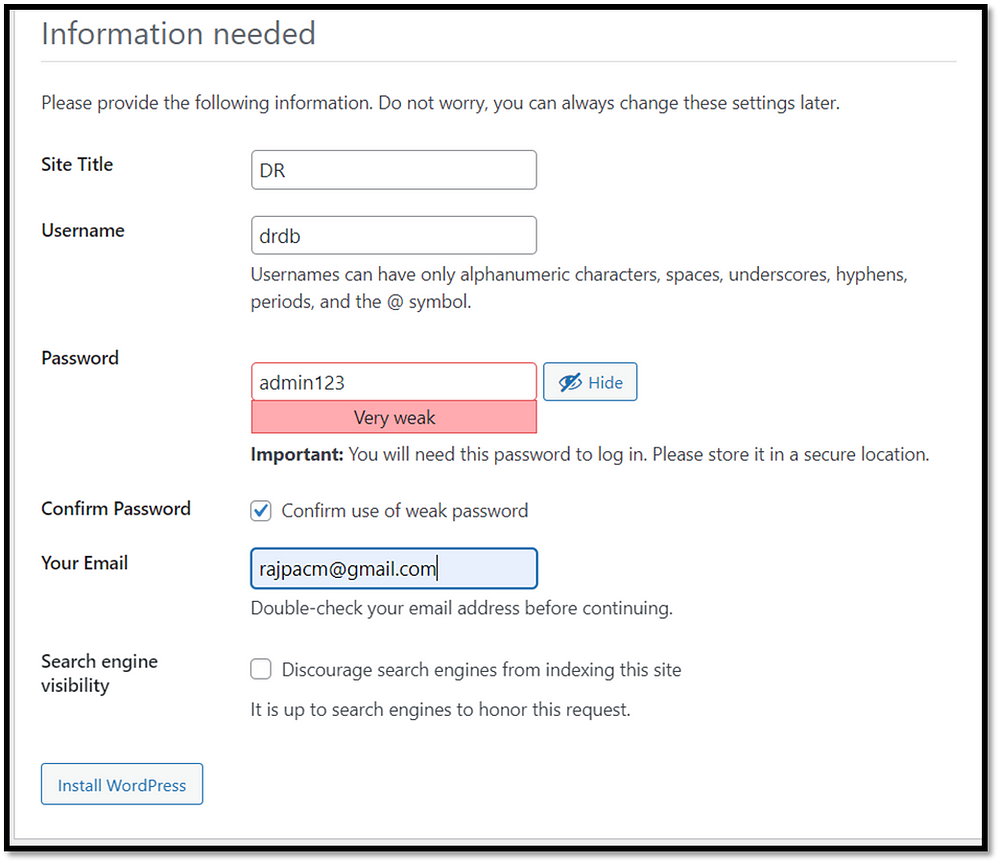
IN PROD ENV,
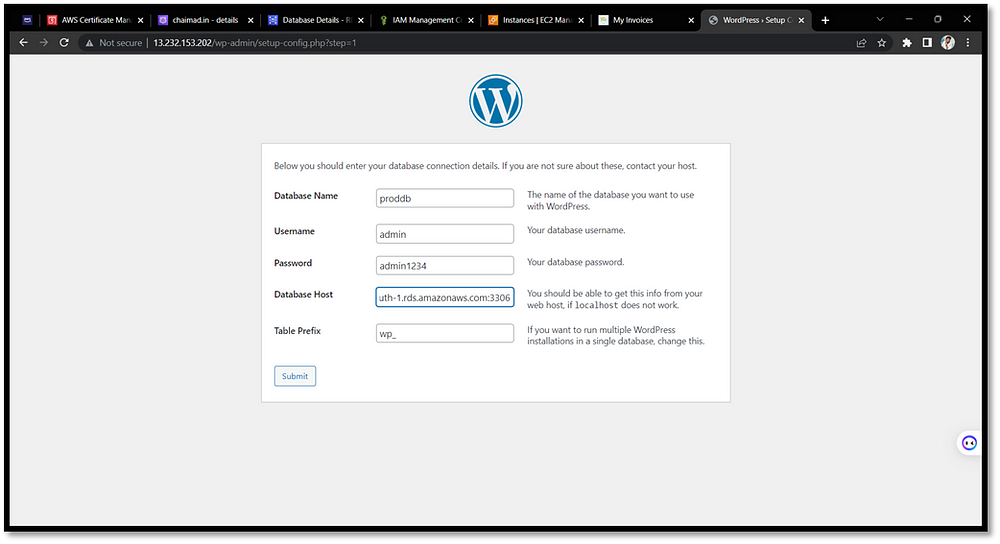
(Copy prod Instance IP and hit on web, Enter username and password given on prod rds)
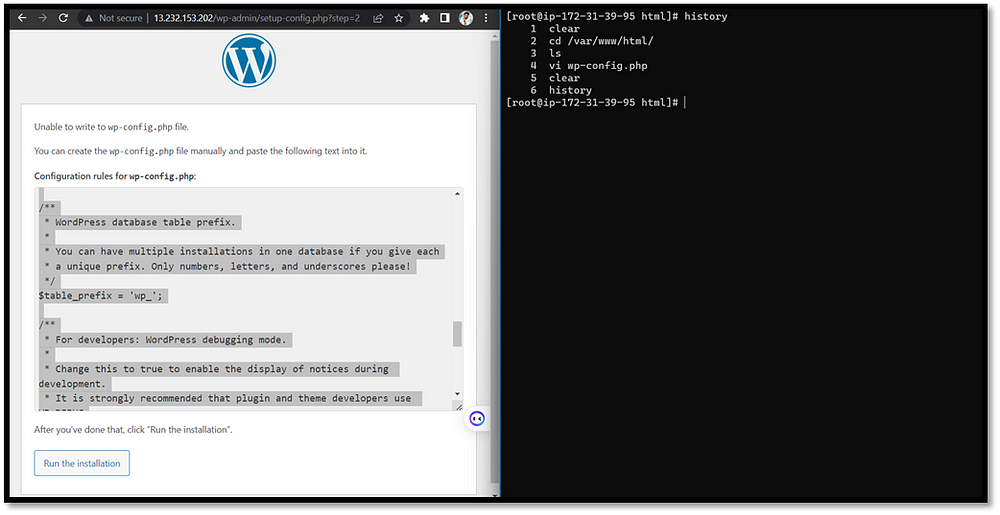
(copy the file code and paste it by creating wp-config.php file in cd /var/www/html)
IN DR ENV,
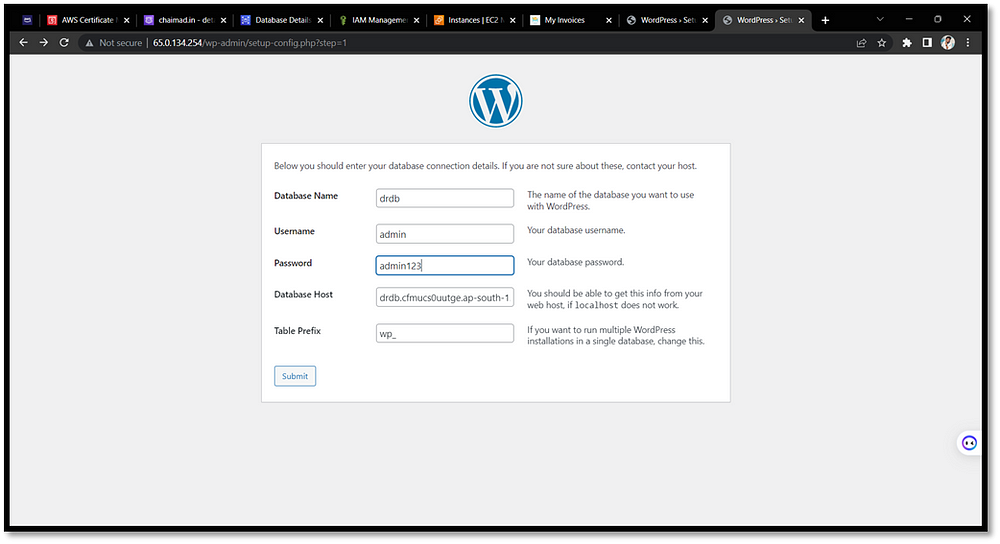
(Copy dr Instance IP and hit on web, Enter username and password given on dr rds)
Prod url — http://13.232.153.202/wp-admin/
Dr url — http://65.0.134.254/wp-admin/
Instance IP (PROD) — http://13.232.153.202/
Instance IP (DR) — http://65.0.134.254/
STEP 7: Create Load Balancer
FOR PROD ENV,
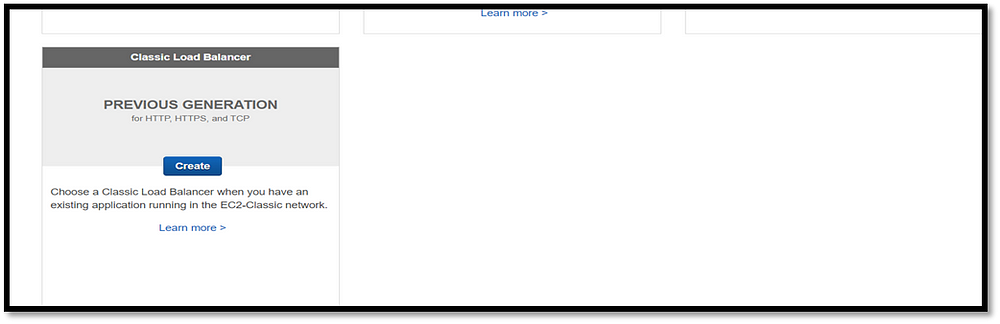
(Create a classic load balancer)
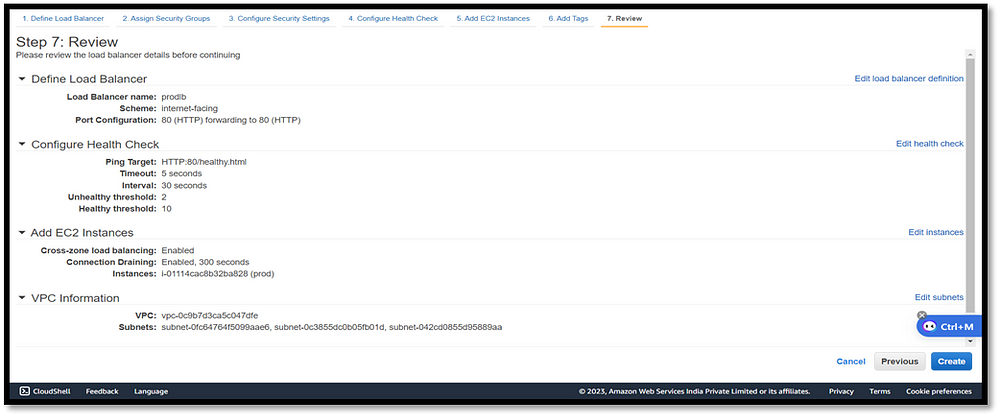
(prodlb created, path- /healthy.html and mapped with prod instance)
FOR DR ENV,
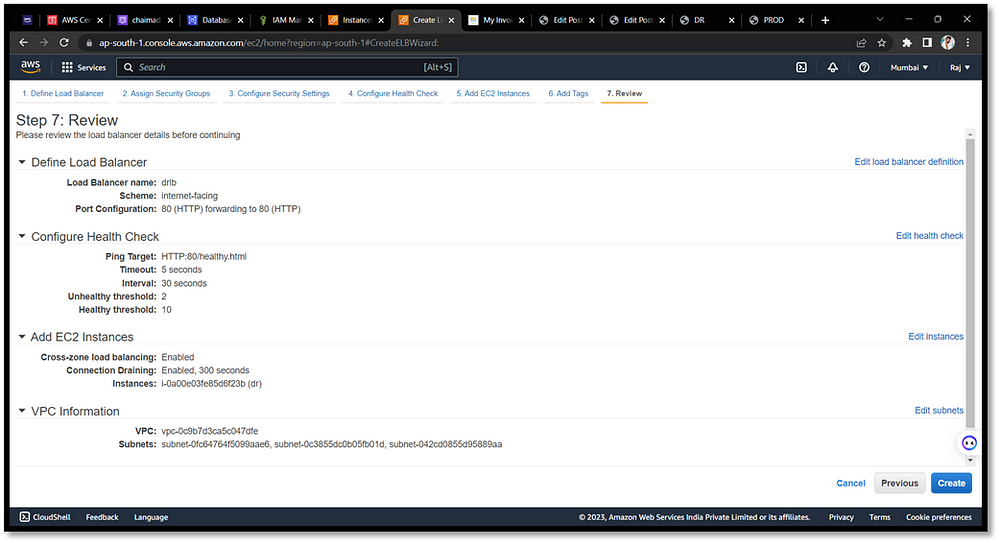
(drlb created, path- /healthy.html and mapped with dr instance)
Prod LB DNS — prodlb-978367993.ap-south-1.elb.amazonaws.com
DR LB DNS — drlb-761105092.ap-south-1.elb.amazonaws.com
STEP 8: Mapping Route53 and ELB
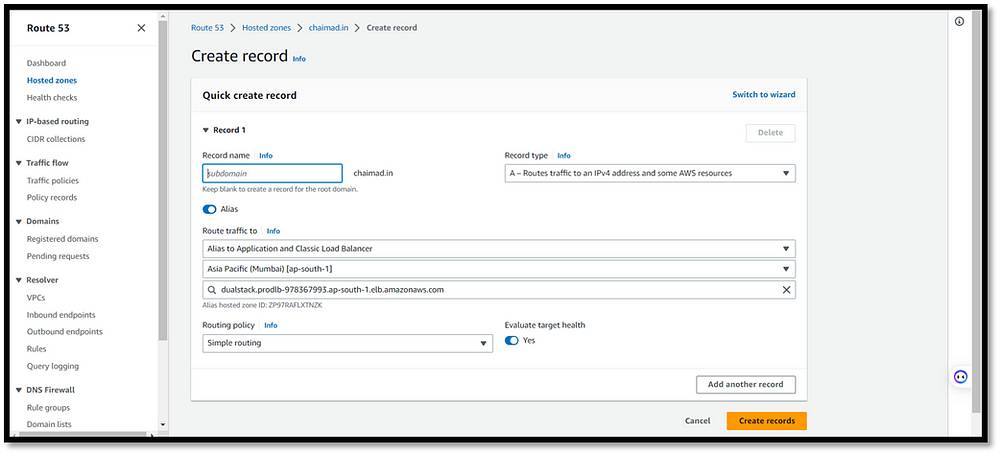
(Create new record and select prod lb)
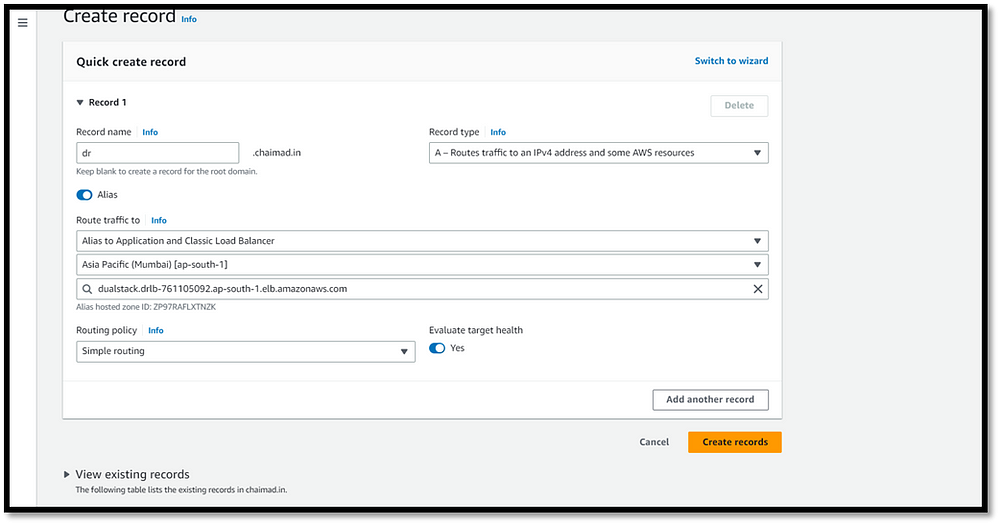
(Create new record and select dr lb)
Hit web (chaimad.in — shows prod env), (dr.chaimad.in — shows dr env)
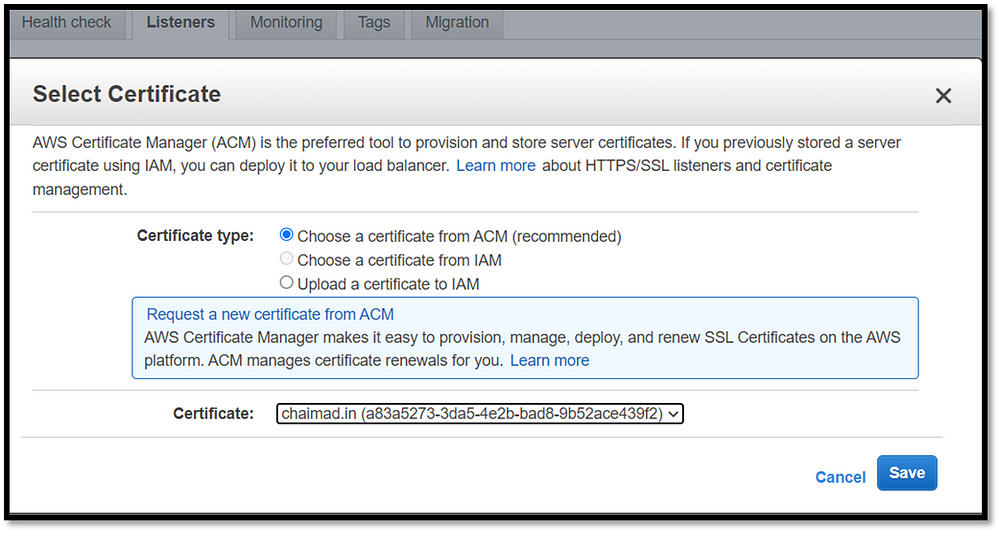
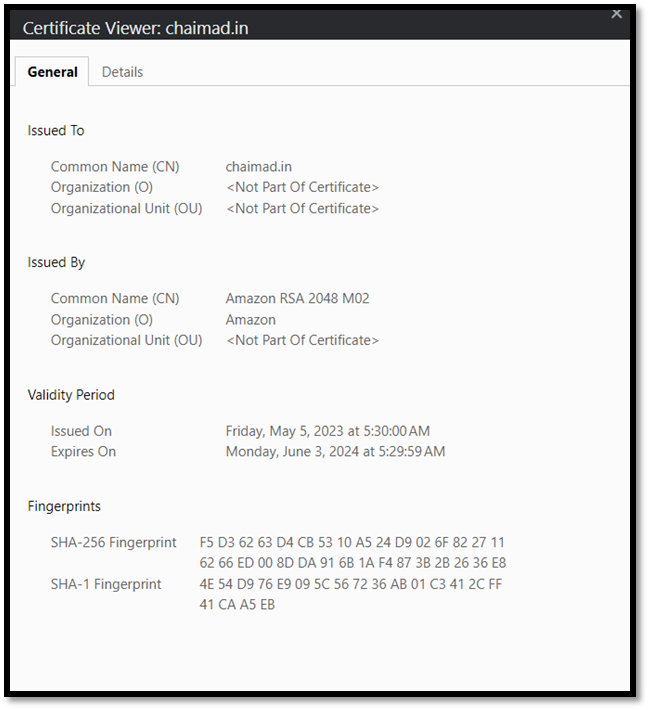
STEP 9: Secure Connection for website
For Prod ENV,
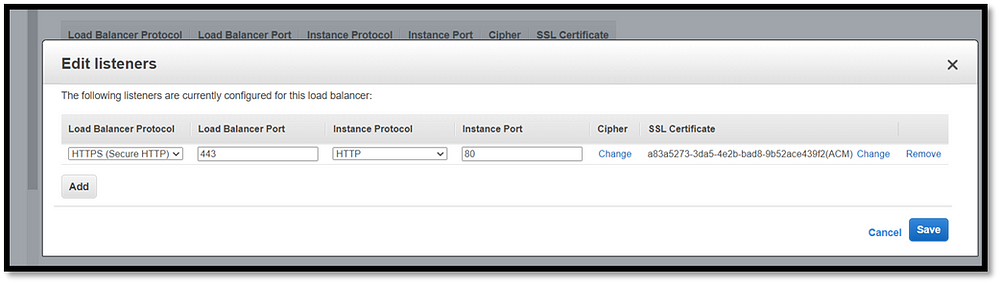
· Load Balancer — Listeners — change HTTP to HTTPS and SSL Certificate
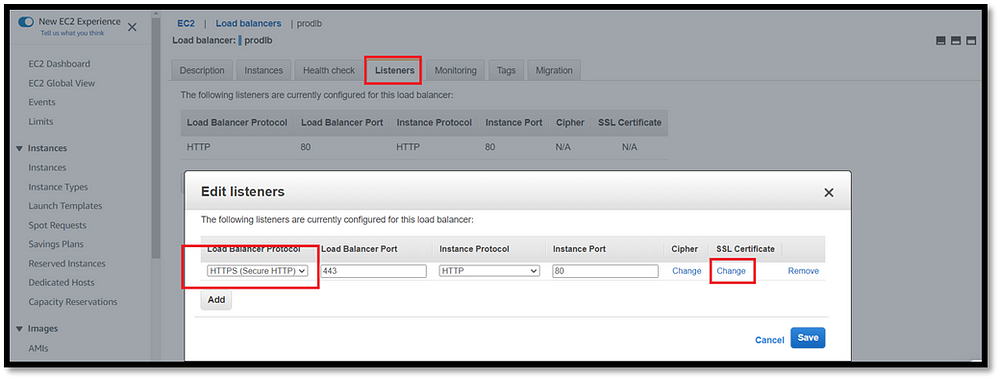
https://chaimad.in/ = website changes to secured connection
For DR ENV
https://dr.chaimad.in/ = website changes to secured connection
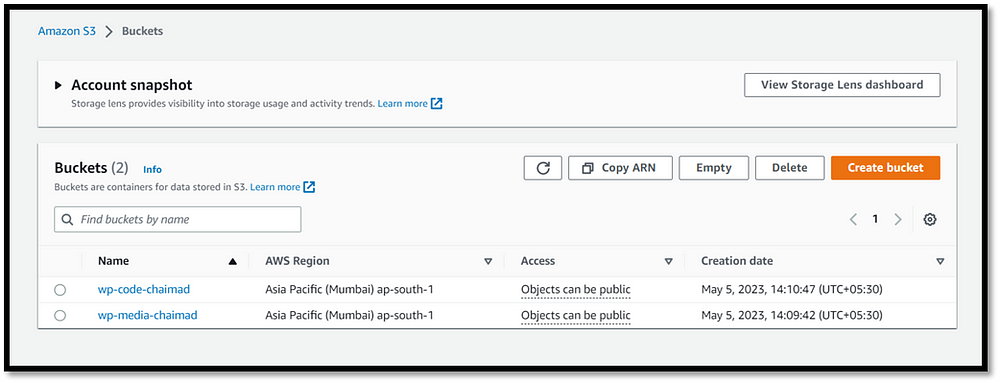
STEP 10: Create two buckets on S3
· One for media files
· Another for code files
IN PRODUCTION Terminal:
Crontab -e
*/2 * * * * aws s3 sync - delete /var/www/html/wp-content/uploads s3://wp-media-chaimad
*/2 * * * * aws s3 sync - delete /var/www/html/ s3://wp-code-chaimad
IN DR Terminal:
Crontab -e
*/2 * * * * aws s3 sync - delete s3://wp-media-chaimad /var/www/html/wp-content/uploads
*/2 * * * * aws s3 sync - delete s3://wp-code-chaimad /var/www/html/
THE CONTENT IN PROD ENV WILL SYNC TO DR ENV using S3
Hit DR Instance IP it show PROD IP Content
OUTPUT:
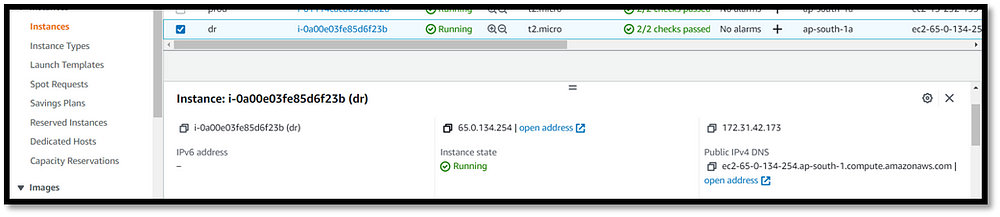
(DR INSTANCE IP)
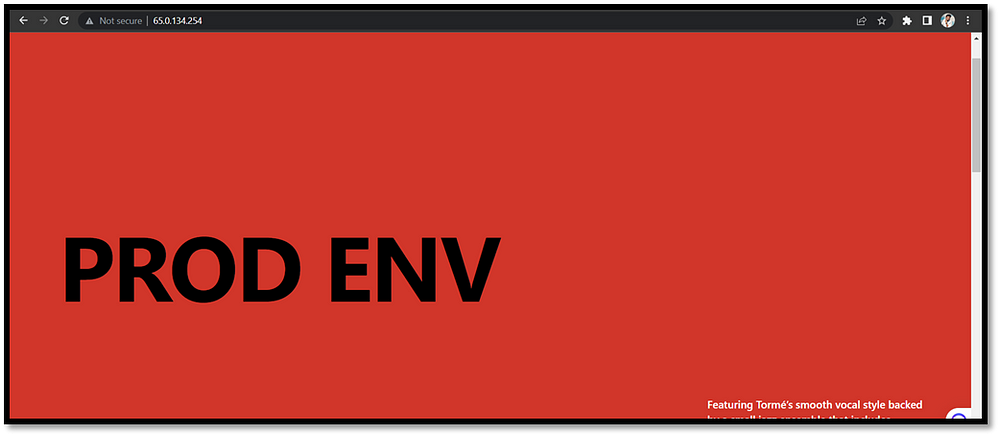
(The DR Env shows PROD ENV which is sync to the Prod Env)